In this post, I write the configuration to allow an OPC client to acces OPC server by remote in Windows XP SP2.
OPC Product: DeviceXplorer, MatrikonOPC, KepServerEx
Here are:
1. Make sure PC server and PC client connected by ethernet connection (it doesn't matter weather we use cross or straight connection).
2. Make sure we use the same account and password on both PC.
3. Make these configuration on both PC server and PC client :
============================================================
DCOM security setting

a. Open Component Services window
Go to Start->Run and then type "dcomcnfg"
b. On the component services window, go to Console Root->Component Services->Computers
c. Right click on the "My Computer" and select "Properties"
d. Go to Default Properties tab
e. On the Default Distribution COM Communication Properties frame, set "Connect" for Default Authentification Level and "Identity" for Default Impersonation Level.
f. Go to COM security tab.
g. On the "Access Permissions" and "Launch and Activation Permissions" frame click on "Edit Limits" and "Edit Default" button step by step. On each step, make sure these group or user name has been listed: "ANONYMOUS LOGON", "Everyone", "INTERACTIVE", "NETWORK", and "SYSTEM". Don't forget to check all checkbox on the "allow" side for each group or user name.
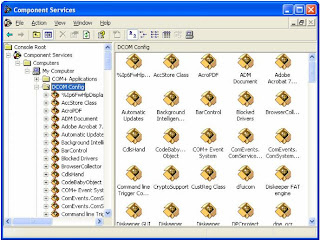
h. Go to Console Root->Component Services->Computers->My Computer->DCOM Config
i. Find the OPC server you want to access on list, right click on it, and then select "properties"
j. On the General tab, set the Authentication Level to "Connect"
k. Go to security tab.
l. Set "Customize" on both "launch and Activation Permissions" and "Access Permissions" frame, step by step click on both Edit button and make sure these group or user name has been added : "Everyone", "INTERACTIVE", "NETWORK", and "SYSTEM". Check all the checkbox on the "Allow" side for each group or user name.
m. Go to identity tab and then chack to the "The interactive user" radiobox.
n. Again, go to Console Root->Component Services->Computers->My Computer->DCOM Config
o. Find "OpcEnum", right click on it, and then select properties.
p. Do the same as j, k and l step above.Then go to identity tab and then chack to the "The system account (service only)" radiobox.

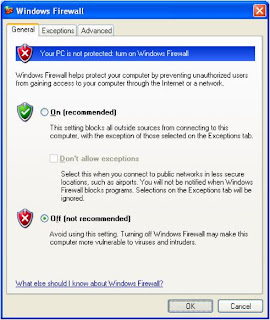
Windows Firewall
Turn off the Windows Firewall.
Control Panel->Windows Firewall, on the general tab, click on "Off (not recomended)" radiobox.

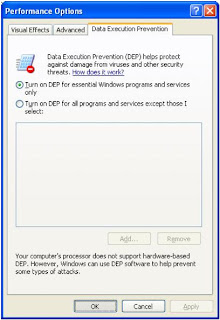
Data Execution Prevention
Go to system properties.
Control panel->System and then go to Advance tab. On the Performance frame, click on "Setting" button. Then go to Data Execution Prevention and make sure that on the "Turn on DEP for essential Windows programs and services only" radiobutton has been checked.
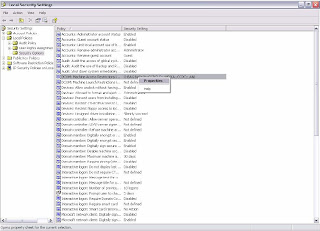
Local Security Policy

a. Control Panel->Administrative Tools->Local Security Policy
b. Go to Security Settings->Local Policies->Security Options
c. Find "DCOM: Machine Access Restrictions…", right click on it then select "properties".
d. Click on the "Edit Security ..." button
e. Make sure these group or user name : "Everyone", "INTERACTIVE", "NETWORK", and "SYSTEM" has been added. Check all the checkbox on the "Allow" side for each group or user name.
f. Find "DCOM: Machine Launch Restrictions…" right click on it, and then select "properties"
g. Do the same as step d and e.
h. Find "Network access: Let Everyone permissions apply to
anonymous users", right click on it, and then select "properties"
i. Select to the "Enable" radiocheck
j. Find "Network access: Sharing and security model for local accounts", right click on it, and then select "properties".
k. On the local security tab, select "Classics - local users authenticate as themselves"
============================================================
4. Try to access OPC server by remote
Run your OPC client software, fill node with the IP address of PC server (PC which OPC server has been installed) and then browse the OPC server list available on the remote PC server. The configuration successful if the OPC server can be listed from OPC client.
src="http://pagead2.googlesyndication.com/pagead/show_ads.js">


No comments:
Post a Comment